Canon EOS 70D users may encounter many problems when imputing the MOV clips from Canon 70D to iMovie. In this article, you will learn the way to convert Canon 70D H.264 MOV files to AIC native codec for imovie, and then you can edit Canon 70D video natively.
“I heared that iMovie can accept .mov files, but why I cannot imput these clips to iMovie’11 for editing? What am I doing wrong? Any suggestion is appreciated. Thank you in advance!”
In fact, it is hard for iMovie’11(08 or 09) to support the H.264 MOV clips from Canon 70D in that the files are compressed with the H.264 codec QuickTime format. Due to the coder – decoder it adopts, you may meet importing problem while you want to transfer Canon 70D H.264 MOV files to iMovie for editing/burning your home videos.
For viewing or editing the videos which is encoded, you need the same codec to decode it to play or edit. As we all know, iMovie prefers the AIC codec, so the difference between the codecs causes the importing, even the decoding problem. Since you can not use the AIC to decode a H.264 QuickTime file, so you need to find another way to solve the problem.
You are advised to find a best third party program to transcode Canon 70D H.264 MOV to Apple InterMediate Codec(AIC) for editing in iMovie, with the native codec, you can edit smoothly.
Guide to convert Canon 70D H.264 MOV clips to iMovie AIC codec on Mac
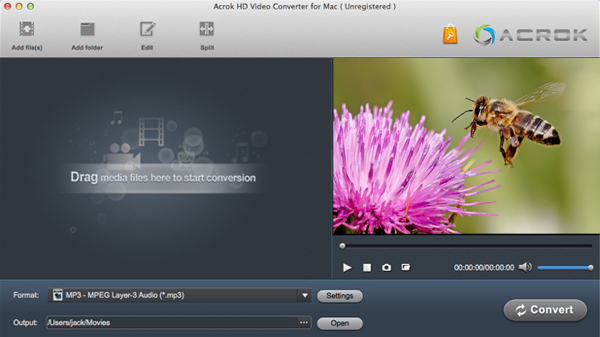
Step 1: Install and run the best Canon 70D H.264 MOV converter you have downloaded. Import Canon 70D 1080i MOV files to the 70D MOV to iMovie Converter.The Add Button on the top of the main interface of the converter allows you to import Canon 70D MOV files directly.

Tips:
1. You can double click the each file to have a preview.
2. If necessary, you can tick the “Merge into one” box to merge 70D 1080i MOV files together.
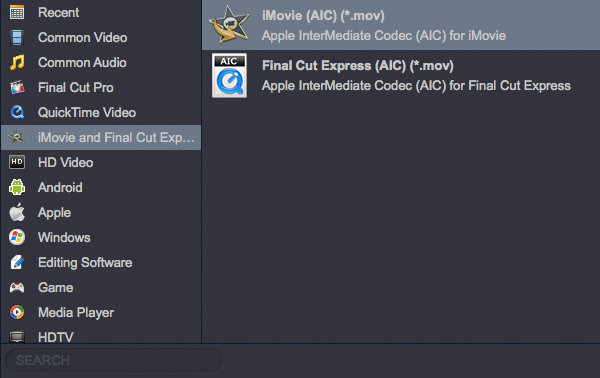
Step 2: Select an output format for iMovie’11(08 or 09) and set the output folder.You are advised to choose ” iMovie and Final Cut Express-Apple Intermediate Codec (AIC)(*.mov)” as the export format which is most compatible format for iMovie .

After choosing the correct output format, you can set the output folder by clicking “Browse” icon to choose the right place that you want to save your converted file on your computer.
Step 3: Click “Settings” icon to adjust audio and video parameters. You can adjust codec, bit rate, frame rate, sample rate and audio channel in the Profile Settings interface according to your demands.
Tip: You’d better set the video frame rate as 30fps, video size as 1920*1080 to keep the best quality for editing Canon 70D 1080i MOV in iMovie’11(08 or 09) on Mac. (If you are recorded in PAL, the 25fps as the frame rate is the best choice for you.) If you wanna have a smaller file size but keep the good quality, you can decrease the audio or video bitrate.
Step 4: Start conversion of your Canon 70D 1080i MOV file to AIC for iMovie editing.
After conversion 100% finished, you can run the iMovie to import the converted files and edit them in it without any rendering or incompatibility problem. Just free try this Canon 70D to iMovie converter now!

No responses yet